We recommend that you install SMS-Magic with the Grant access to all users option.
There are a number of steps necessary to configure permissions for specific users:
1.Clone the standard user and edit the clone.
2.Configure Custom App Settings.
3.Configure Custom Object Permissions.
4.Save the profile and assign it to users.
5.Verify Permissions.
6.Check the FLS permission of SMS-Magic Objects.
The procedure is given below.
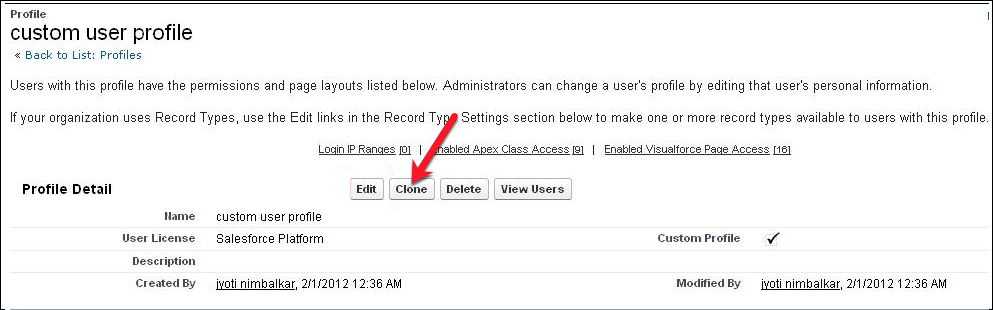
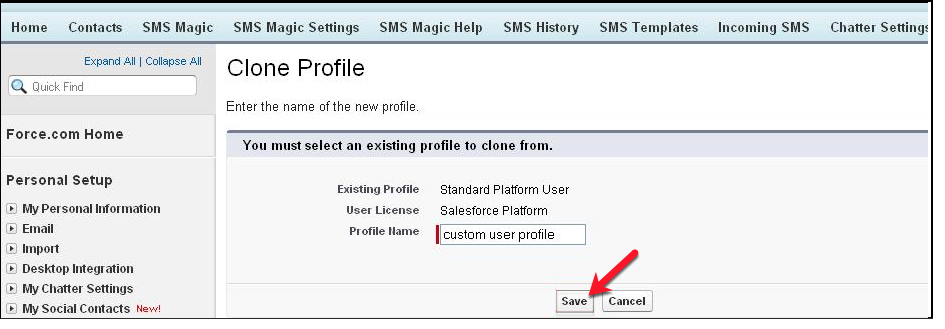
Clone a standard user profile
Suppose you want to enable SMS-Magic for a user with a standard profile, such as a “Standard Platform User”. Because permissions are not editable in standard profiles, it is first necessary to make a clone of this profile, and then configure the permissions in that profile for SMS-Magic.
Enter a Profile Name to profile and Save it.
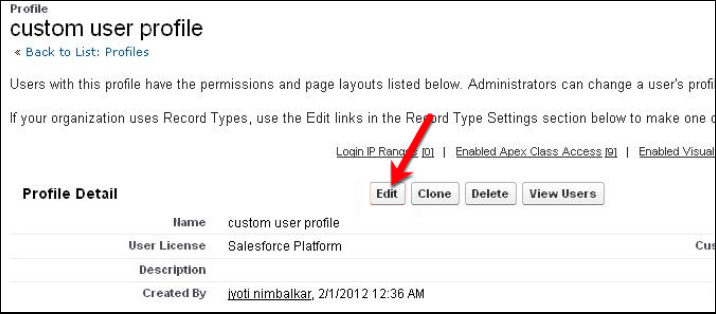
Next, click Edit to access the new user profile.
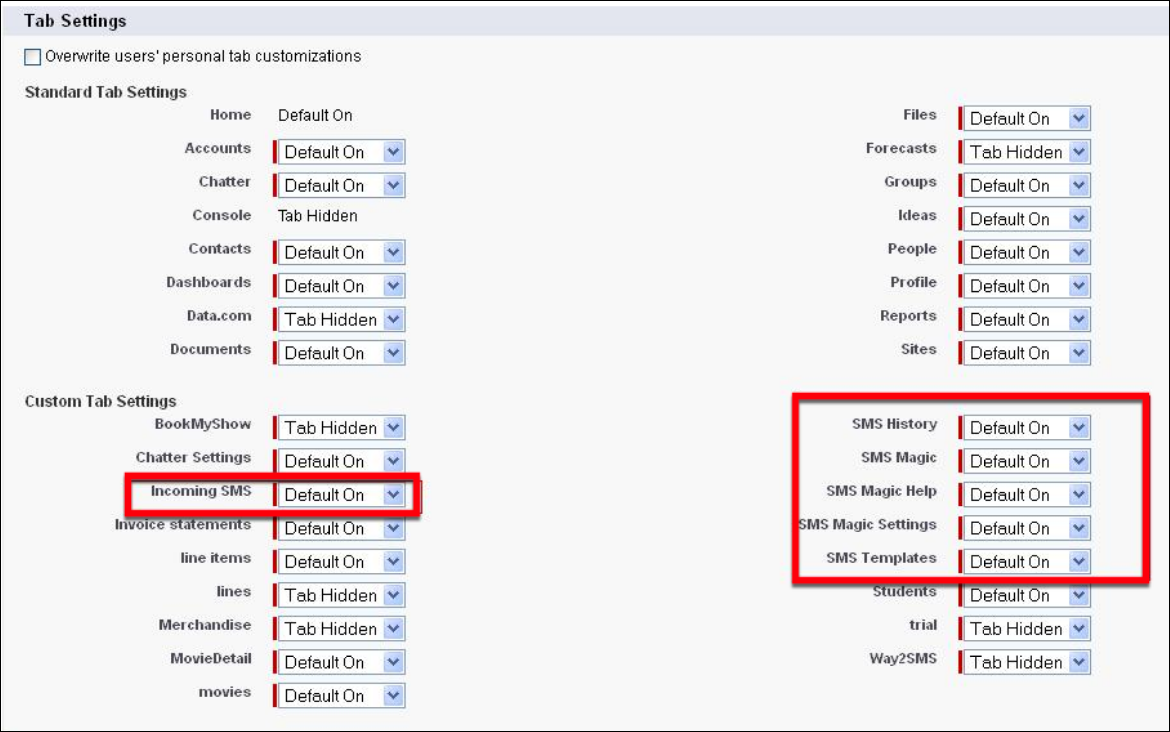
Configure Custom App Settings
Configure custom app settings as follows.
Custom App settings – Ensure that SMS Magic Interact or Basic is “visible” to the profile.

Tab Settings – Ensure that the Incoming SMS tab and all SMS-Magic tabs are visible.
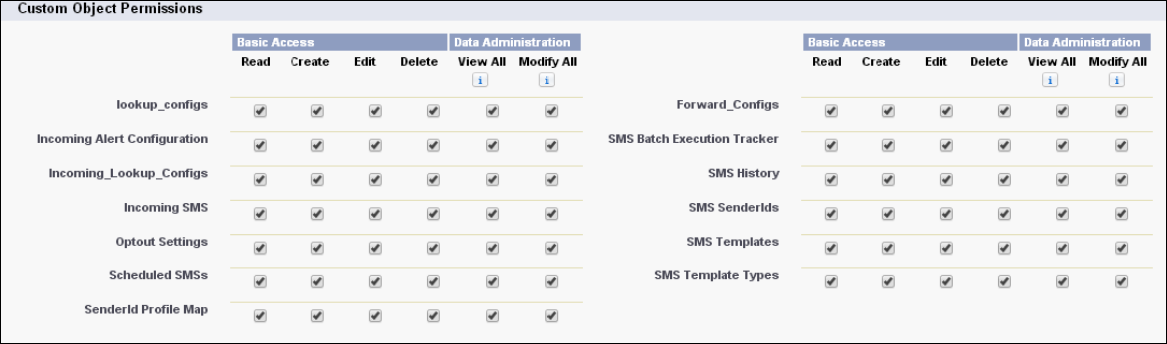
Custom Object Permissions
Modify all SMS-Magic object permissions as follows:
Save the profile and assign it to a user
Save the profile so that it is available for assignment to users who you want to give access to SMS-Magic package.
Verify Permissions
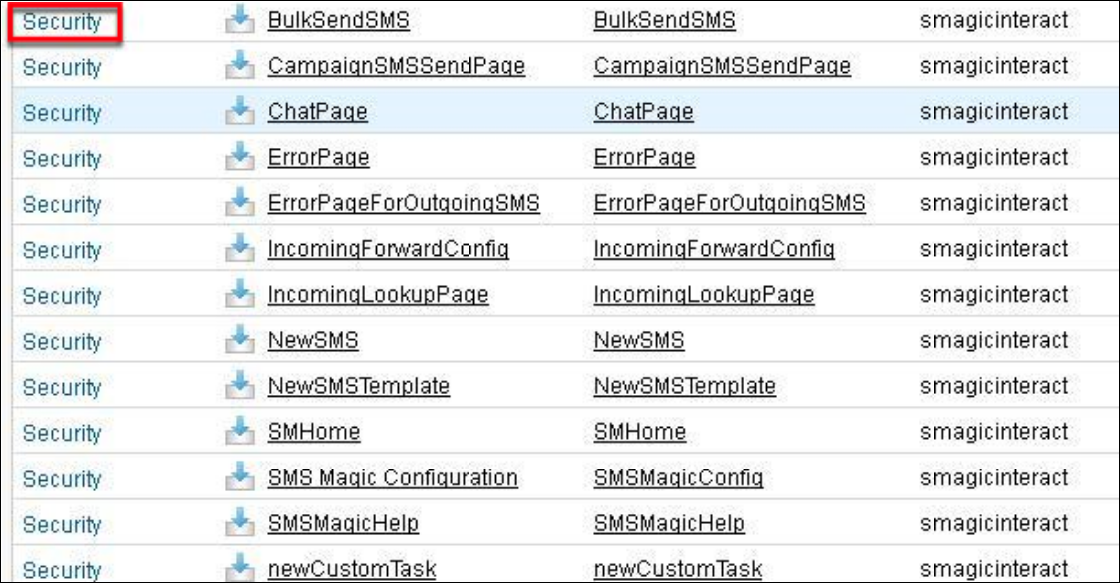
Check if the custom profile created has the permissions for accessing the SMS-Magic Visualforce pages. Navigate to Setup > App Setup > Develop > Pages.
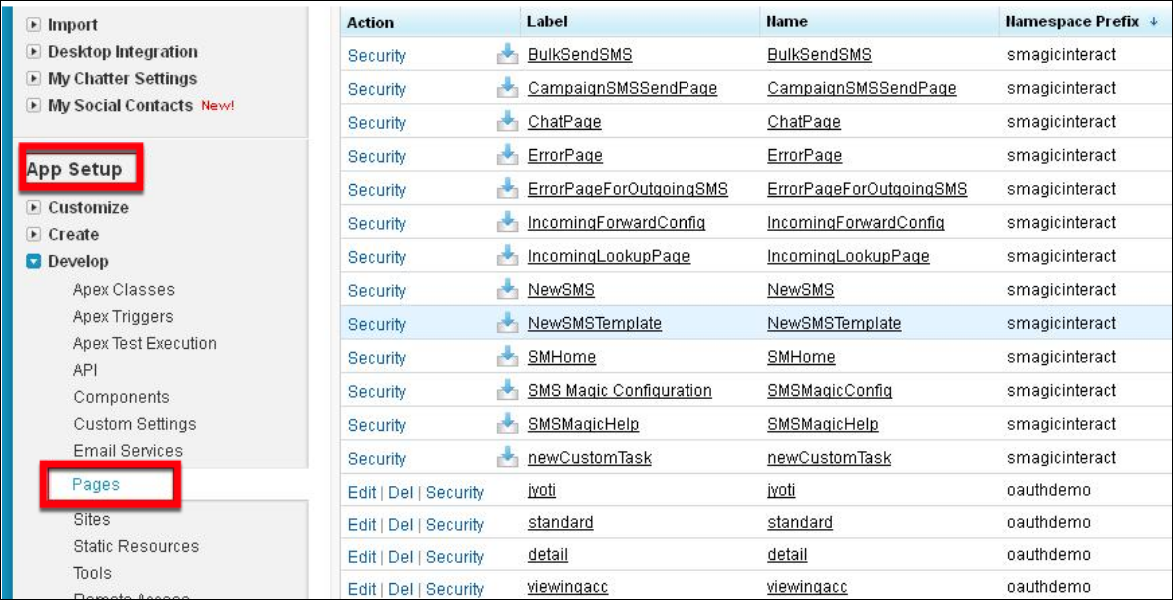
Filter all the SMS-Magic pages. Click on the Security link of a few pages to see that the user profile should appear in the enable profiles listing of each one.
Users having this profile should be able to access SMS-Magic Objects or tabs.
Also make sure that the user is having permission for all fields of objects from the SMS-Magic Interact package as well as the fields of objects which are involved for sending SMS.
Check the FLS permission of SMS-Magic Objects
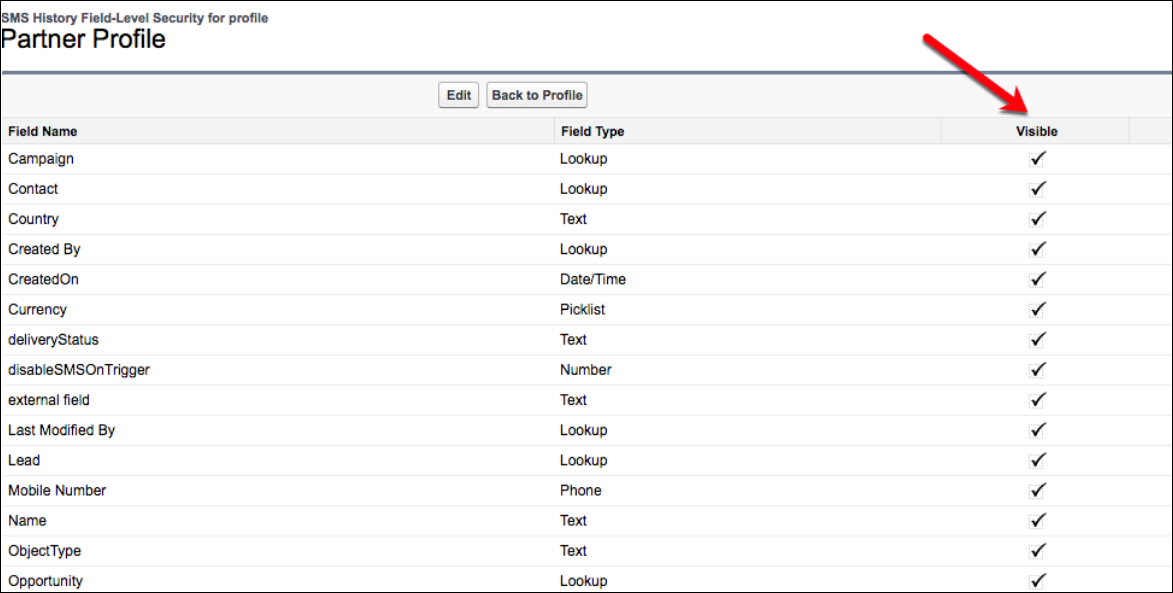
From the user profile page, you also need to give FLS (Field Level Security) access to the following custom objects and the fields of each object:
•SMS History
•SMS Sender Id
•SenderId Profile Map
•SMS Templates
•SMS Template Type
•Incoming SMS
•Action On Incoming SMS
•Incoming Lookup
•Incoming Alert Configuration
•Opt-out Setting
To do this, go to user profile to which you want to give access to SMS-Magic. In the Field-Level Security section, click View next to the object(s) you want to modify, and then click Edit.
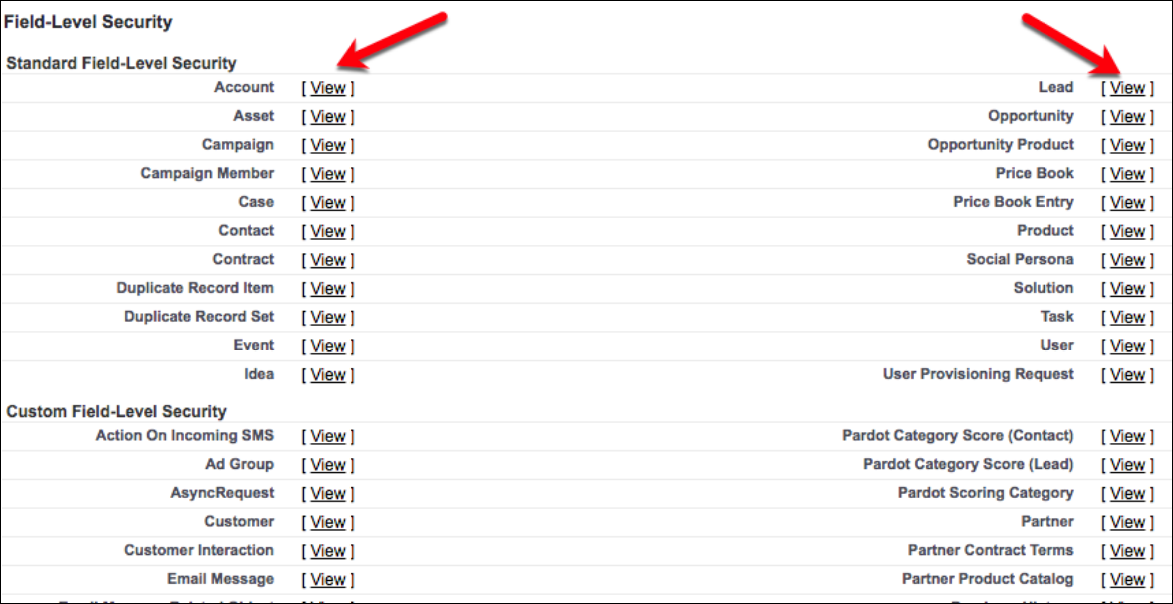
For each field that you want to provide access for this user profile, check the Visible box. Click Save.
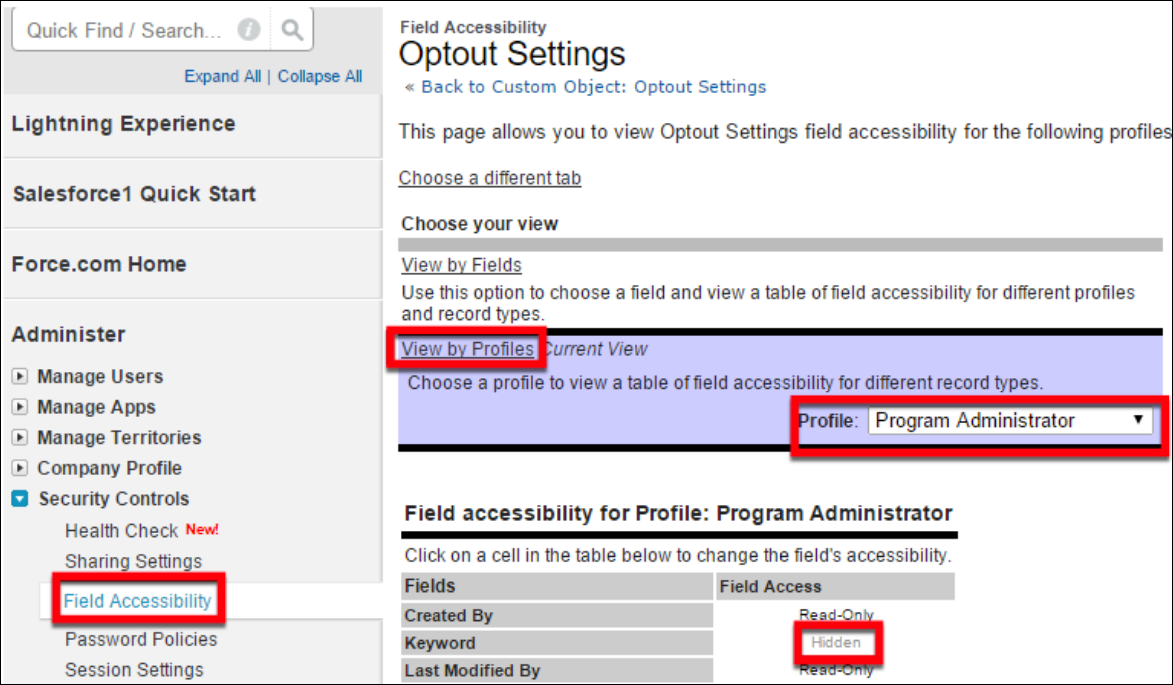
You can also check FLS permissions by navigating to Setup > Security Controls > Field Accessibility.
Push SMS Callout
To send SMS message with a custom code, the user must have permission to access the SMS History object.
June 2015 Release — Additional permission and constraints
The user must have specific permission to send SMS messages in bulk or from campaigns.
If the user doesn’t have sufficient permission to “Read” any merge fields of the SMS template while sending a message, this error message will appear:
“You do not have permission to render fields of {{objectname}} template.”